


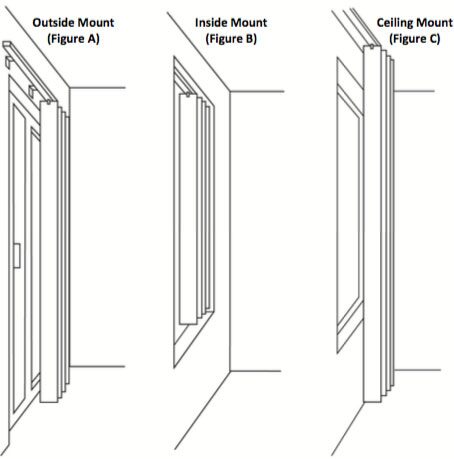
Where the brackets are screwed into the top of the reveal

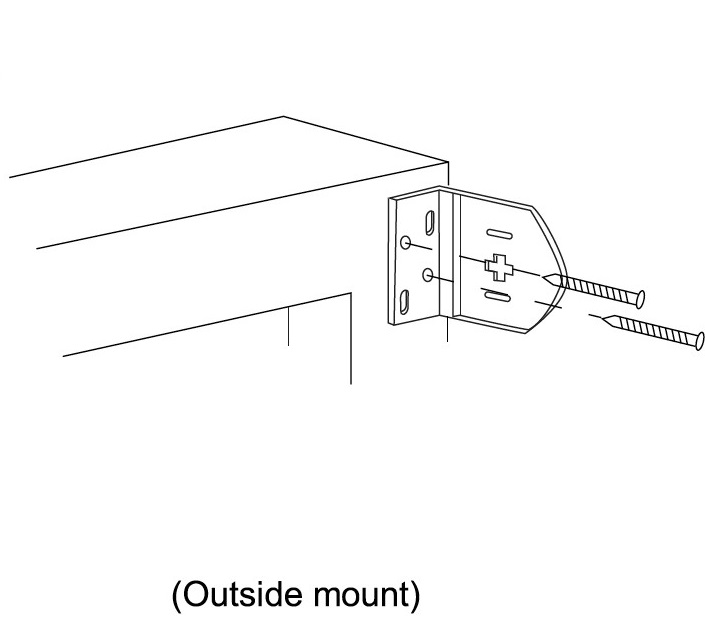
Where the brackets are screwed onto a facing surface a wall or window frame
Where the brackets are screwed into the side walls of the reveal

The cord retaining device must be installed at the maximum distance possible from the control mechanism to prevent looped cords from becoming slack. Place the retaining device on the wall and mark the position of the screw hole(s) with a pencil. Attach the retaining device to the wall using the fixings provided.
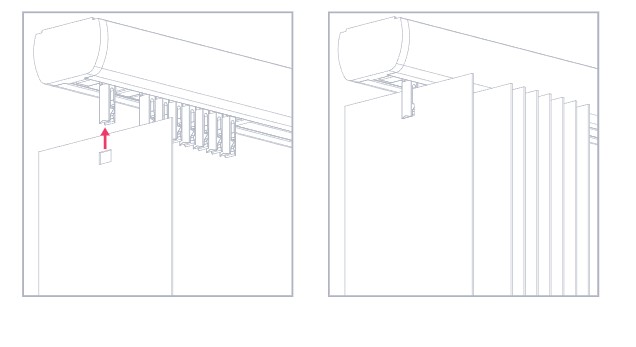
Use the single hole in the top of the bracket to fix to the top of the reveal. The protruding tab on the bracket should be closest to the window
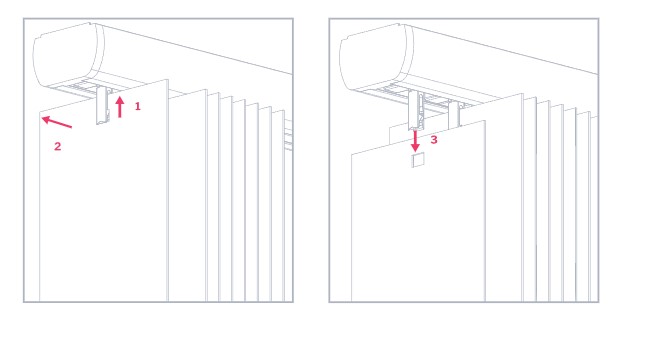
Join the bracket to the ‘L’shaped face-fixing plate. Use two screws through the back plate to mount onto a facing surface a wall or window frame

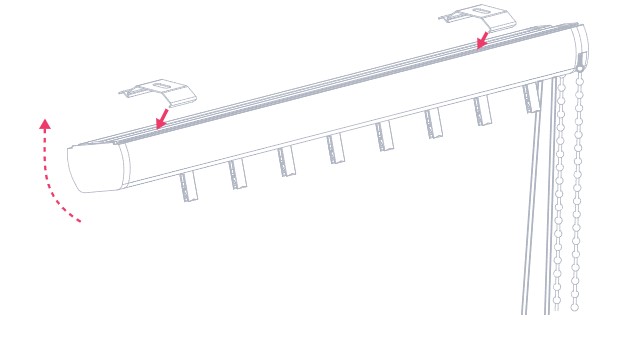
that the position of the outermost brackets should be at least 5cm away from the ends of the rail, with any other brackets evenly distributed across the width.
make sure that you mount them at least 75mm in front of either the window frame, or any protruding vents or handes, if there are any. This allows space for the louvres to turn open and closed.
Your vertical blind is fully compliant with the latest safety standards. It has been supplied with a ‘P-Clip’tensioning device to keep the cords and the chain child safe. Slot both the cord and the beaded chain into the ‘P-Clip’and secure it to the wall or window frame (if you are fixing to the facing surface then the cord and chain will form a figure of eight, this is fine and will not affect the operation of your blind).
Note: Please note that the P-clip must be installed. The cord must be kept under tension to prevent it from sagging down from the headrail when the blind is drawn open.
Where the brackets are screwed into the top of the reveal
Where the brackets are screwed onto a facing surface a wall or window frame
Where the brackets are screwed into the side walls of the reveal
The cord retaining device must be installed at the maximum distance possible from the control mechanism to prevent looped cords from becoming slack. Place the retaining device on the wall and mark the position of the screw hole(s) with a pencil. Attach the retaining device to the wall using the fixings provided.